Download the Project
- Eclipse project and full source for “Fling”
Overview
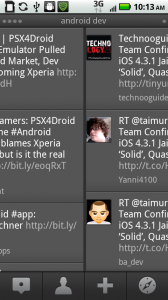
I’ll keep the narrative on this one brief and get you right to the good stuff. I wanted to be able to navigate through the activities in an Android app just like Tweetdeck. One swipe of the finger and you quickly transition to the next column. Take a look at how it looks when you swipe your finger from right to left.
 pre-fling |
→ |
 during fling |
→ |
 post-fling |
In Android, they call this a “fling”. Think of a fling as a touch and drag with a specific direction and speed threshold. Once that speed threshold is surpassed, the fling is triggered. Here’s the bare bones code necessary to get fling gestures working in your Android app. Also, I use custo animations based on the ones from the Android SDK to determine how my activities will transition. A left to right fling should obviously have the opposite appearance as a right to left fling. Big thanks to this post as it makes up a majority of the logic and code in this sample.
src/MainActivity.java
This is where the heavy lifting is done. The important things to note are the use of a custom gesture listener to handle our fling event and the use of overridePendingTransition() to apply our custom transition animations to the activity we just started.
package com.savagelook;

import android.app.Activity;
import android.content.Intent;
import android.os.Bundle;
import android.view.GestureDetector;
import android.view.GestureDetector.SimpleOnGestureListener;
import android.view.View;
import android.view.MotionEvent;

public class MainActivity extends Activity {
    private static final int SWIPE_MIN_DISTANCE = 120;
    private static final int SWIPE_MAX_OFF_PATH = 250;
    private static final int SWIPE_THRESHOLD_VELOCITY = 200;
    private GestureDetector gestureDetector;

    /** Called when the activity is first created. */
    @Override
    public void onCreate(Bundle savedInstanceState) {
        super.onCreate(savedInstanceState);
        setContentView(R.layout.main);

        gestureDetector = new GestureDetector(new MyGestureDetector());
        View mainview = (View) findViewById(R.id.mainView);

        // Set the touch listener for the main view to be our custom gesture listener
        mainview.setOnTouchListener(new View.OnTouchListener() {
            public boolean onTouch(View v, MotionEvent event) {
                if (gestureDetector.onTouchEvent(event)) {
                    return true;
                }
                return false;
            }
        });
    }

    class MyGestureDetector extends SimpleOnGestureListener {
        @Override
        public boolean onFling(MotionEvent e1, MotionEvent e2, float velocityX, float velocityY) {
            Intent intent = new Intent(MainActivity.this.getBaseContext(), MainActivity.class);

            if (Math.abs(e1.getY() - e2.getY()) > SWIPE_MAX_OFF_PATH) {
                return false;
            }

            // right to left swipe
            if(e1.getX() - e2.getX() > SWIPE_MIN_DISTANCE && Math.abs(velocityX) > SWIPE_THRESHOLD_VELOCITY) {
                startActivity(intent);
                MainActivity.this.overridePendingTransition(
                        R.anim.slide_in_right,
                        R.anim.slide_out_left
                );
            // right to left swipe
            }  else if (e2.getX() - e1.getX() > SWIPE_MIN_DISTANCE && Math.abs(velocityX) > SWIPE_THRESHOLD_VELOCITY) {
                startActivity(intent);
                MainActivity.this.overridePendingTransition(
                        R.anim.slide_in_left,
                        R.anim.slide_out_right
                );
            }

            return false;
        }

        // It is necessary to return true from onDown for the onFling event to register
        @Override
        public boolean onDown(MotionEvent e) {
                        return true;
        }
    }
}
res/layout/main.xml
A standard main.xml. The only change you’ll find here is that we’ve given the main view, our LinearLayout, an ID so it is accessible in MainActivity.java.
 version="1.0" encoding="utf-8"?>
 xmlns:android="http://schemas.android.com/apk/res/android"
    android:orientation="vertical"
    android:layout_width="fill_parent"
    android:layout_height="fill_parent"
    android:id="@+id/mainView"
    >

      android:layout_width="fill_parent"
            android:layout_height="wrap_content"
      android:text="@string/hello"
  />
>
AndroidManifest.xml
Again, a standard manifest with one small change. I added android:noHistory=”true” so that as we load new activities with each fling, the view stack doesn’t grow out of control. You can remove this if you would like to go back to a previous activity after each fling using the back button.
 version="1.0" encoding="utf-8"?>
 xmlns:android="http://schemas.android.com/apk/res/android"
      package="com.savagelook"
      android:versionCode="1"
      android:versionName="1.0">

     android:icon="@drawable/icon" android:label="@string/app_name">
         android:name=".MainActivity"
                  android:label="@string/app_name"
                  android:noHistory="true">
            >
                 android:name="android.intent.action.MAIN" />
                 android:name="android.intent.category.LAUNCHER" />
            >
        >
    >
>
res/anim/slide_in_right.xml
This along with the next 3 animations are the custom transition animations used to move our activities in and out with each fling. They are just copies of the animations in the Android SDK. In my case, they were found in ANDROID_SDK/platforms/android-8/data/res/anim. Create your own anim folder under res in your project and add these there.
 xmlns:android="http://schemas.android.com/apk/res/android">
         android:fromXDelta="50%p" android:toXDelta="0"
            android:duration="@android:integer/config_mediumAnimTime"/>
         android:fromAlpha="0.0" android:toAlpha="1.0"
            android:duration="@android:integer/config_mediumAnimTime" />
>
res/anim/slide_out_right.xml
 xmlns:android="http://schemas.android.com/apk/res/android">
         android:fromXDelta="0" android:toXDelta="50%p"
            android:duration="@android:integer/config_mediumAnimTime"/>
         android:fromAlpha="1.0" android:toAlpha="0.0"
            android:duration="@android:integer/config_mediumAnimTime" />
>
res/anim/slide_in_left.xml
 xmlns:android="http://schemas.android.com/apk/res/android">
         android:fromXDelta="-50%p" android:toXDelta="0"
            android:duration="@android:integer/config_mediumAnimTime"/>
         android:fromAlpha="0.0" android:toAlpha="1.0"
            android:duration="@android:integer/config_mediumAnimTime" />
>
res/anim/slide_out_left.xml
 xmlns:android="http://schemas.android.com/apk/res/android">
         android:fromXDelta="0" android:toXDelta="-50%p"
            android:duration="@android:integer/config_mediumAnimTime"/>
         android:fromAlpha="1.0" android:toAlpha="0.0"
            android:duration="@android:integer/config_mediumAnimTime" />
>
Summary
Its a little more work than you might expect for this functionality, but you do get a lot of opportunities to tinker with it. You can change the speed threshold for when flings occur. You can change both the current and incoming transition animations. You can even get creative and make transitions based on vertical or diagonal flings as well. Thats the beauty, and sometimes curse, of Android: near infinite flexibility.


sweet…
you know any way to limit the history to “cache” 1 or more activities?
Excellent tutorial. So excellent I actually copied it by hand and got it to work without using the project. Trust me, that’s good.
Now, you may find this funny but, how on earth does one add individual content to x number of ‘views’? (specifically in Eclipse which is not the best ‘designer’ interface in the world)
Do please bear in mind this is only the second tutorial I’ve done (the first excellent working one is: http://developingthedream.blogspot.com/2011/01/android-canvas-frame-by-frame-animation.html )
And how does one ‘control’ how many ‘views’ there are available?
Forgive my naivety, I am merely, what some refer to as, a ‘designer’.
Pils,
I am working on this now. There might be a better or more canonical way, but this is working for me in a little demo:
o I have only two views inside the view flipper
o keep a ‘currently displayed index’ into the list of elements to be displayed
o on swipe right to left, check if there is any data below the current index, if so decrement the current index, fill the view not being displayed with data at the new index, set the appropriate animations, and then use the view flipper to swtich to it.
o do the opposite on swipe left to right
That’s the general idea. I’ve cleaned it up so that the layout of the individual views inside the flipper is defined once in xml and a LayoutInflater is used to
create each of the two views from it.
It works well, the code is not ugly, but it seems a lot of manual work to do something that is so fundamental to the mobile user experience – hence the
nagging feeling that I’m missing something provided out of the box.
I understand pretty much how work your code and enjoyed it. Thanks so much it’s hard to find good documentation on it.
But now, I’d like to do as your screenshots upper in this page: A fling where screens follow my fingers.
Can you help me for it. I really don’t know where I should start.
Great tutorial. It really helped.
This is really what I need.
Thanks for your great work.
nice tutorial..thanks..It really helped…:)
Nice Work! Thanks for the tutorial and including the source
how do i send to the diferent activity ??
@KuroNeko: The line that determines which activity comes next is:
Intent intent = new Intent(MainActivity.this.getBaseContext(), MainActivity.class);
If you want to go to a different activity, you just need to change the second parameter of the Intent constructor.
Intent intent = new Intent(MainActivity.this.getBaseContext(), YOUR_ACTIVITY_CLASS.class);
You
are my God! Thank you for the code.
Good day
It has been asked before(above) but did not answered by someone
“Now, you may find this funny but, how on earth does one add individual content to x number of ‘views’? ”
For example, my app has four(4) screens, how to I swipe to all of the. I searched but couldn’t find any about it nowhere!
Thanks
[...] into how to get fling to work. Found another example https://savagelook.com/blog/android/swipes-or-flings-for-navigation-in-android that uses a linear layout instead of the [...]
Just want to say thanks helped A LOT!
thank u .. but when i am using that my activity does not accept on long click
please can any one help me …
While I understand you wrote this a while back, the problem with this is that it doesn’t actually do the Tweetdeck-like UI sort of workspace panning. At best, you get a delayed animation after the fact in response to a swipe, and it replaces the entire activity, not just the smaller portion of the activity.
The preferred way to handle the “Tweetdeck-like” UI is to use a ViewPager, which was introduced July 2011 and is compatible with API level 4 and up. See http://developer.android.com/sdk/compatibility-library.html
…the sample app that comes with it demonstrates the compatibility lib’s various functionality… for the Tweetdeck-like UI, you’ll want to take a look specifically at the “Fragment Pager” within the sample.
@Alphatrak: yes thats what I was thinking while going through this tutorial. ViewPager is just an awesome View to achieve this in Android though its bit complex to understand at first.
is there a way that you can swipe left to right and go back to the previous activity?
Hey man, great tutorial. However can you tell me how to perform the same on widget buttons.
I have a problem:
I have buttons on the layout, and this causes that do not get the touch from the mainview
I tried to put Linearlayout on the buttons but this causes that do not catch the click on the buttons
Great Work..! but i cant understand on thing i want to hold the screen on my finger how it possible…your image show like that….??
Hi, the animation is too fast and I can’t see it…is it normal?
thanks bro
Hey man, use full tutorial thanks a lot
Hello there, Your tutorial is very helpful. Can i know how to perform this without using intent?
MainActivity.this.overridePendingTransition(
R.anim.slide_in_left,
R.anim.slide_out_right
);
This line is given error in my code. overridePendingTransition(int,int) method is not applicable on this object.
plz give me solution..